PowerPoint is a powerful presentation tool that can make your ideas look more professional and attractive. You can use it to add images, customize text, choose colors, and so on. However, sometimes you may want to remove some of these elements from your slides while giving a presentation.
Free PowerPoint Presentation Template
For example, if you are using an image as a background image for your slide, but you do not want this image to be visible during the presentation, then you can remove it easily.
What is Background Removal?

Background removal is the process of isolating an object from its background. This is a very common task in computer vision, and it’s one of the things that make computer vision possible.
One way to think about background removal is as a subtractive operation: you start with your image and remove everything except for what you want to keep. If you’re working with photos, this might be a person against a white background or a building against a blue sky. If you’re working with other types of images, it might be a cat against green grass or a car against a red brick wall.
In this article, we will show you how to remove the background image and tips on PowerPoint presentation from PowerPoint slides.

1) Select the image
The first thing you’ll need to do is locate your image on your computer. Once you’ve found it, double-click on it to open it in PowerPoint.
Next, select the image by clicking once on it with your mouse. If there are multiple layers in your image (like text or shapes), make sure that all layers have been selected by clicking once on each layer with your mouse (if there are any).
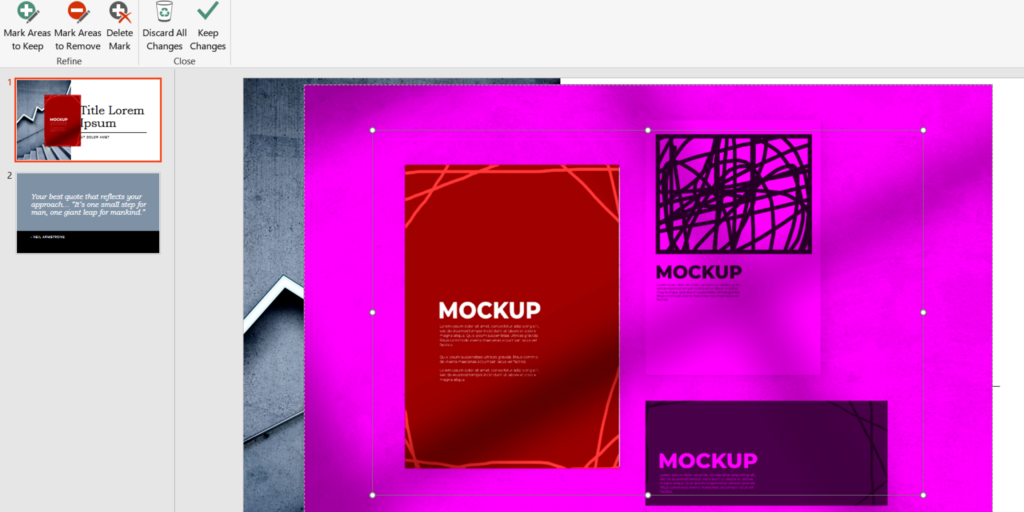
2) Select the format tab and remove the background
Select the format tab and then select remove background. Next, select the area of your image that you would like to keep and then press the delete key on your keyboard. Now, save your file, and you are done!
Use eraser
The easiest way to remove a background in PowerPoint is to use the Eraser tool. Select the object with the background, and then go to Home > Drawing Tools > Eraser.
Use the Eraser tool and drag over the part of the image that you want to remove. You can also change the brush size by clicking on it and dragging up or down on your mouse button.
The other option is to use the Fill Color button, which can be accessed by clicking on Design > Fill Color (or Alt + Shift + F). This will open up a dialog box where you can choose from various colors and patterns for your background.
If you’re using an image file that already has transparent areas, then you can just select those areas and copy them into your presentation file by copying them into PowerPoint via Ctrl + C or right-clicking on them and selecting Copy Image from the drop-down menu.
Uses of background settings
Adjusting the removal settings in PowerPoint is a great way to make sure that your audience can see what you want them to see. And if you’re presenting on a big screen, it’s important to make sure that you don’t remove any important elements of the slide design.
Remove background with cutout
This is the most common removal setting you will use. It allows you to select an area on your slide that you want to remove from the background. For example, if you have an image of someone standing in front of a building, you want to remove the building so that only the person is visible. This type of removal is great for images that may contain text or other objects that don’t suit your needs.
Remove background with transparency
This option allows you to remove the background and make it transparent so that any objects behind it will appear through it. This is great when you want to put something like a logo over another image or object.
Remove background completely
If you’re working with an image that has no solid-color areas or if there are large areas where you cannot select anything, this option allows you to remove all colors from your image leaving only transparent space on your slide where there used to be color; this can be useful if your main concern is removing the background rather than adding something new (like text) behind it.
Final words
The Background Removal tool works by taking advantage of something called transparency — some images have transparent areas that allow other objects behind them to show through — while other images don’t have any transparent areas at all, which means that everything in an image is opaque (solid). If there are any partially transparent areas in your picture, then Microsoft Office PowerPoint will only remove those areas when using this feature.
Check out our website https://www.visualspiders.com/ to know more about our PowerPoint Presentation Services
Related Content: Things you must know to Create Click to Zoom Effect in PowerPoint